⬇️ INSTANT DOWNLOAD
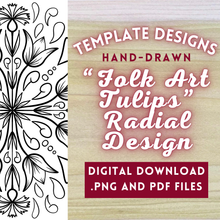
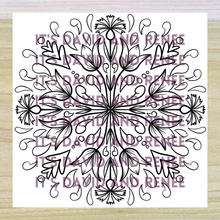
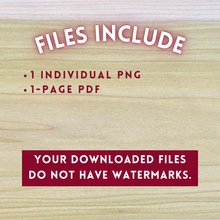
This is a digital product. You can download the below files without watermarks immediately after purchase:
- 1 1-page PDF, standard paper size
- 1 PNG file, 800dpi
These images work with any app that can import/open a .PNG file. (Procreate, Photoshop, Canva, etc.)
~~~~~~~~~~~~~~~~~~~~~~~~~~~~~~~~
✅ PERSONAL USE:
You may use this graphic on your personal or non-profit projects without credit, although credit/being tagged on social media is always nice and lets me see what you create with my images. If you make a piece of art with this design, you may sell it (see commercial uses below).
~~~~~~~~~~~~~~~~~~~~~~~~~~~~~~~~
✅ COMMERCIAL USE:
This template design may not be used for large-scale mass production, reproduction, print-on-demand sites, resale, or other commercial uses. HOWEVER, if you are an artist and wish to sell your artwork that you make with this design, you may do that, assuming you are acting in good faith and not selling your work in the commercial uses listed above.
If you would like an Extended License for commercial uses, please contact me at hello@itsdavidandrenee.com.
~~~~~~~~~~~~~~~~~~~~~~~~~~~~~~~~
✅ PRINTING AND RESIZING THE TEMPLATE:
I like to print on my "draft" or "ink-saving" printer setting because it uses less ink. I also highly recommend printing in gray-scale to save your ink!
PDFs and PNGs can be enlarged or shrunken directly from your computer printer settings.
When you open the PDF or PNG file and go to "File, Print," you should see a box in the print settings that says "CUSTOM SCALE" or "SCALE." In that box, you can enter a new percentage such as 50% to reduce the size by half, or 200% to double it. You can also change the paper size in the "PAPER SIZE" box if you want to print it on a different sized paper.
All print menus have resizing capabilities, so if you're having trouble please don't hesitate to reach out.
~~~~~~~~~~~~~~~~~~~~~~~~~~~~~~~~
🔥 HOW TO GET THE DESIGN ONTO THE WOOD FOR WOODBURNING // GRAPHITE TRANSFER PAPER METHOD:
This method involves using a graphite-coated paper to transfer a design onto a surface.
1. With the design printed out on your paper, tape one edge of the paper down (design-side-up) so that you can still flip the paper up. Tape it down really well- if it comes off, it can be very tricky to line your design back up perfectly the way it was.
2. Place the graphite paper, graphite side down, between the paper and the design. It's okay if the graphite paper moves around- it does not need to be taped.
3. Now trace over the design lines with a pen or pencil. Colored ink pens make it easier to see where you’ve been- I like to use a red pen or a hot pink colored pencil. You do not need to use heavy pressure to transfer the design through the graphite paper. Just use your normal handwriting pressure.
4. Flip back and forth between the wood and your design to make sure you got all the lines and details.
5. Pull up the graphite paper and design and carefully remove the tape from your surface.
Tutorials are found here: https://www.woodburncorner.com/burnblog/how-to-transfer-images-onto-wood-without-using-heat?rq=graphite
And here: https://www.youtube.com/watch?v=DZV9LPZV-T4
~~~~~~~~~~~~~~~~~~~~~~~~~~~~~~~~
🔥 HOW TO GET THE DESIGN ONTO THE WOOD FOR WOODBURNING // PENCIL ON PAPER METHOD:
This method involves using a soft graphite pencil or stick to transfer a design by covering the back of the original design and then tracing it onto a new surface.
1. Start by printing your design off on paper and grab a sharpened pencil.
2. You need to cover the back of the page with graphite. Go crazy. I find that laying the tip of my pencil on its side at a 45-degree angle and scribbling quickly is the fastest and most efficient method for me.
3. Once it is covered, place the print-out graphite side down on the wood and tape it down along the edge of the paper.
4. Trace over the design lines with a pen or pencil. Colored ink pens make it easier to see where you’ve been- I like to use a red pen or a hot pink colored pencil. You do not need to use heavy pressure to transfer the design onto the wood. Just use your normal handwriting pressure.
5. Flip back and forth between the wood and your design to make sure you got all the lines and details.
6. Pull up the design and carefully remove the tape from your surface.
This method works for all surfaces that accept pencil – wood, leather, paper, etc.
Tutorials are found here: https://www.woodburncorner.com/burnblog/how-to-transfer-images-onto-wood-without-using-heat?rq=graphite
And here: https://www.youtube.com/watch?v=DZV9LPZV-T4
~~~~~~~~~~~~~~~~~~~~~~~~~~~~~~~~
🚫 TERMS OF USE:
Distributing, lending, trading, sharing, copying, redrawing, claiming as your own, or reselling my products and files is prohibited. You may not do that.
You cannot use these graphics to create or design a product that is directly competing with the original graphic (clipart sets, digital papers, illustrations, graphics, templates, etc).
By purchasing these digital downloadable graphics, you agree to these terms, and you are granted a non-exclusive, non-transferable, revocable, one-person license to use these graphics.
All rights reserved © It's David and Renee © The Noodle Caboodle Co.
Due to the nature of digital products, I cannot offer refunds.
All items are DIGITAL ONLY. There is NO physical shipping. You will not receive anything in the mail.
Please reach out if you have any questions or problems with the downloading, resizing, printing, etc.
~ Renee


